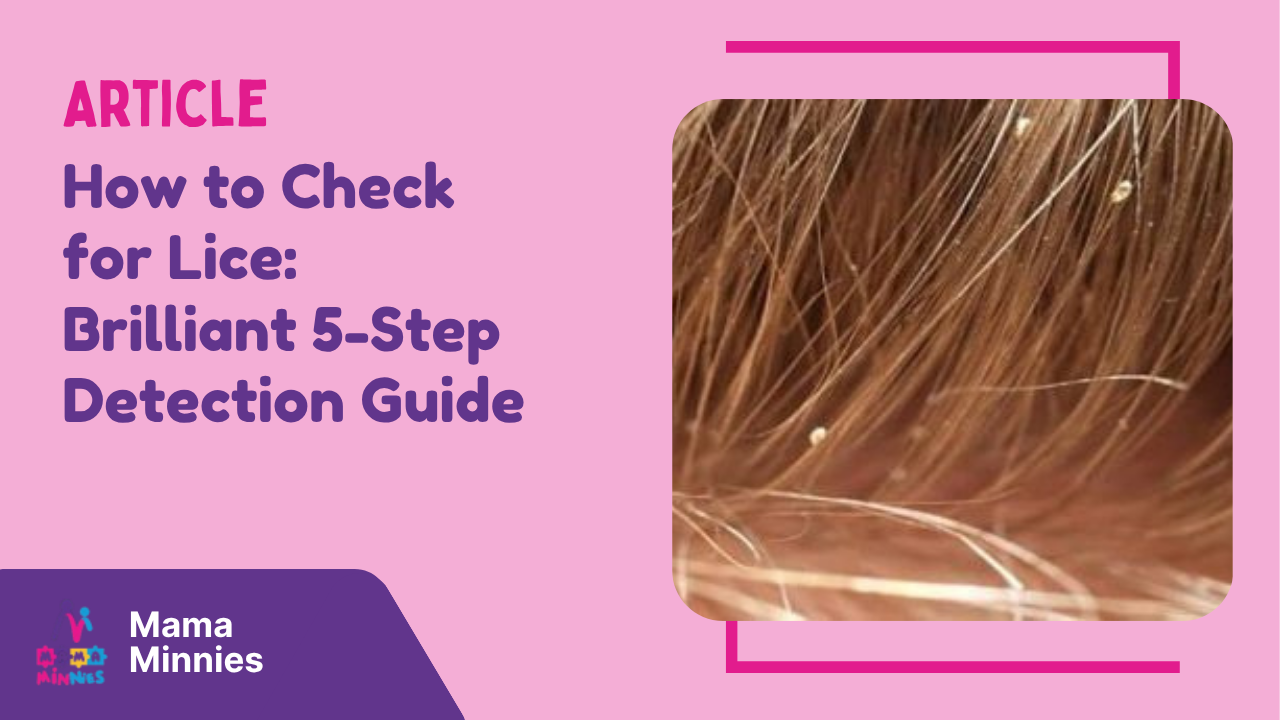
Introduction To Lice Checking
No one wants to discover tiny critters crawling around their scalp, but the truth is — lice can sneak up on anyone, regardless of how clean or careful you are. They spread quietly, moving from head to head during hugs, selfies, or even when kids share hairbrushes and clips. That’s why knowing how to check for lice properly isn’t just a parent’s skill — it’s a household essential.
Doing lice checks correctly can mean catching them early before they multiply and spread across the family. And if you’ve ever wondered why infestations keep coming back even after treatment, it often comes down to missed eggs or improper checking techniques.
So grab your combs and conditioner, because we’re diving into a complete, step-by-step guide on spotting lice like a pro — plus how to keep them from coming back.
Key Takeaways
- Early detection is key to stopping lice before they spread.
- A proper lice check requires a fine-tooth comb, bright light, and patience.
- Nits are stuck firmly to hair shafts — dandruff flakes away easily.
- Checking wet hair makes lice easier to find and slows their movement.
- Using products like Mama Minnies Anti-Lice Lotion and Shampoo ensures effective, gentle removal.
Why Proper Checking Matters
When lice infestations spread through families, the problem often isn’t ineffective treatments — it’s poor inspection. A half-hearted visual check can miss tiny eggs that later hatch, restarting the cycle. A proper lice check, however, helps you spot trouble early and stop lice before they spread.
Imagine your child scratching their scalp during class. You rush to check but only glance at the surface. Two days later, you discover live lice crawling around — and by then, they’ve already laid dozens of eggs. This is a common scenario, and it’s exactly why detailed, methodical checking matters.
If you’ve already dealt with lice before, you might remember the frustration of getting rid of them, only for them to return days later. That’s usually due to missed nits. According to our blog post on Preventing Lice from Spreading in the Family, routine scalp inspections — even after treatment — play a huge role in keeping everyone lice-free.
When done correctly, checking for lice becomes your first line of defense — especially during school outbreaks, daycare seasons, or after a sleepover.
Gathering the Right Tools for Inspection
A successful lice check depends on preparation. Without the right tools, even the most careful inspection can miss what’s hiding beneath layers of hair. Think of it as preparing for a mini mission — precision, light, and patience are your best allies.
Fine-Tooth Lice Comb
Start with a sturdy metal lice comb. Plastic ones may bend or skip the smallest nits, but metal combs with tightly spaced teeth catch even the tiniest eggs. After each stroke, wipe the comb on a tissue to see what you’ve picked up — you’ll be surprised at how much clearer things become.
Bright Light or Natural Sunlight
Good lighting is your secret weapon. Lice are fast, shy, and love shadows. Sit near a window during daytime or use a strong lamp. The shine of a light often reveals the tiny, silvery specks of nits that would otherwise blend into the hair.
Conditioner or Detangler
Before combing, apply a thick layer of conditioner. It slows lice movement and makes them easier to trap in the comb’s teeth. This step is especially useful if your child has long, curly, or thick hair — it keeps things smooth and tangle-free.
By having these items on hand, you’re ready to move from casual checking to professional-level detection.
Preparing the Hair Before You Begin
Preparation makes the difference between spotting a few lice and catching every single one. Whether you’re inspecting yourself, your child, or a loved one, proper prep ensures you don’t miss a thing.
Dampening the Hair
Lice move quickly on dry hair, making them nearly impossible to catch. Lightly wetting the hair slows them down, giving you a better chance to find and remove them. Use a spray bottle or damp towel to make the hair just moist — not dripping wet.
Applying Conditioner Generously
Massage a good-quality conditioner from the scalp to the tips. The conditioner traps lice in place and also makes combing smoother. Many parents prefer to use a natural, gentle product during this step. You can follow up later with Mama Minnies Anti-Lice Shampoo for complete removal and prevention.
Dividing Hair into Sections
Separate the hair into four or more small sections using clips or hair ties. This helps you check every area systematically — especially behind the ears, crown, and nape, where lice love to hide.
The goal is not just to look, but to look everywhere.
Step-by-Step Lice Checking Process
Now comes the real work — the inspection itself. This part requires patience and focus, but when done carefully, you’ll catch every last louse and nit hiding on the scalp.
Start from the Scalp, Not the Ends
Always begin at the roots, because lice lay eggs close to the scalp where warmth helps them hatch. Place the lice comb flat against the scalp and gently pull it all the way to the hair tips. After each stroke, inspect the comb closely.
Wipe the Comb After Each Pass
After each comb-through, wipe the teeth on a white paper towel or tissue. You’ll quickly learn to recognize what’s what — dandruff will flake off easily, but nits stick like tiny tear-shaped beads.
Check the Hotspots
Lice prefer warmth and darkness, so focus on the back of the neck, around the ears, and near the temples. These are the most common “colonies.” You can see how lice behave in such environments in our article How Long Do Lice Survive Without a Host?, which explains their survival instincts and attachment preferences.
Be patient, and don’t rush. A thorough check can take 20 to 40 minutes depending on hair length and texture.
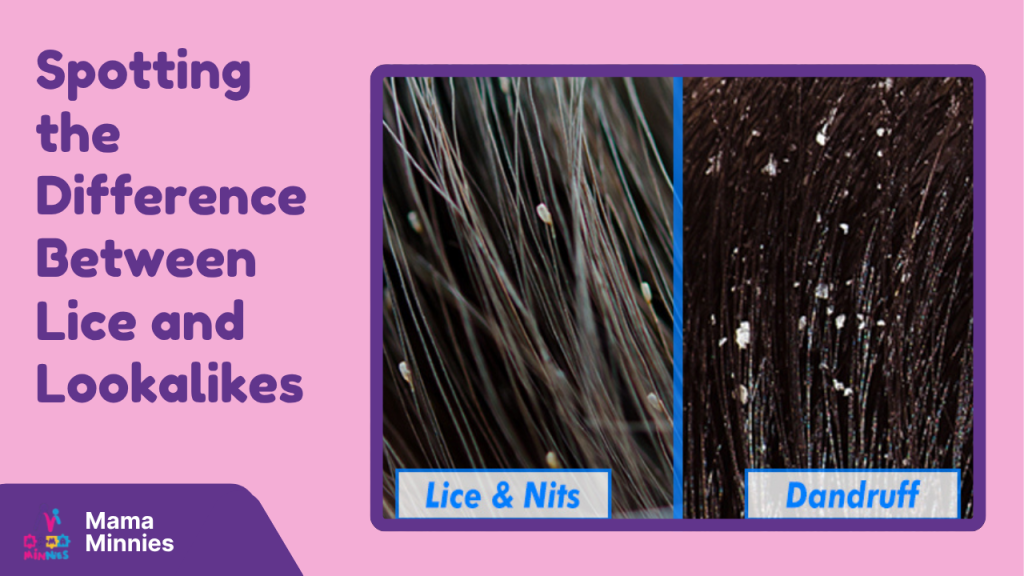
Spotting the Difference Between Lice and Lookalikes
The biggest challenge in checking for lice isn’t just finding something — it’s knowing what it is. Many times, people mistake dandruff, hair product residue, or even dust for lice eggs. Here’s how to tell them apart.
What Live Lice Look Like
Adult lice are about the size of a sesame seed. They can appear grayish, tan, or brown, depending on hair color, and they move fast — especially when exposed to light. If it crawls, it’s a louse.
What Nits (Eggs) Look Like
Nits are tiny oval dots stuck close to the scalp. They might look like shiny grains of rice glued to the hair. If you try to flick them off and they don’t budge, it’s likely a nit.
For a closer comparison, you can explore What’s the Difference Between Lice and Dandruff?, which breaks down visual and textural differences to make identification foolproof.
How Often You Should Check for Lice
Even if you don’t see lice now, don’t get too comfortable. Regular checks are your best form of protection.
After Known Exposure
If someone at school or daycare has lice, start checking immediately and repeat every two to three days for two weeks. Lice eggs take around 7–10 days to hatch, so consistent rechecking ensures you catch new ones early.
During Routine Care
Make lice checks a monthly habit — like trimming nails or washing bedding. Prevention is easier than treatment, and regular inspections help catch early infestations before they spread.
Remember, as explained in Can Head Lice Return After Treatment?, reinfestations often happen because new lice hatch after the first treatment was completed too early or missed during checks.
What to Do When You Find Lice
Finding lice doesn’t mean panic — it means action. Once you confirm their presence, your next steps determine how quickly you’ll get back to a lice-free scalp.
Begin Treatment Immediately
Start with a trusted, safe treatment like Mama Minnies Anti-Lice Lotion or Anti-Lice Shampoo. These gentle formulas are made with natural ingredients, designed to smother lice and loosen nits without irritating the scalp. Unlike harsh chemical treatments, Mama Minnies’ products are safe for both adults and kids, making them ideal for family use.
Comb Thoroughly After Treatment
Even after using a treatment lotion or shampoo, continue combing daily for at least a week. This ensures all eggs and newly hatched lice are removed. You can find more about combined approaches in Lice Treatment Works for Both Adults and Kids?.
Clean Household Items
Wash pillowcases, hair accessories, and recently worn clothes in hot water. Though lice can’t live long off the scalp, it’s smart to minimize the chance of reinfestation.
Common Mistakes During Lice Checks
Even with all the right tools, small mistakes can let lice slip through the cracks.
Rushing the Process
Quick, half-done checks rarely catch everything. Take your time and inspect slowly, section by section. Remember, one missed nit can restart the infestation in just days.
Not Rechecking After Treatment
Lice eggs can survive even the best treatments. Recheck 7–10 days after the first treatment, as any missed nits will have hatched by then.
Confusing Nits with Other Particles
As highlighted in Are Natural Lice Remedies Effective for Adults?, it’s important to correctly identify what’s on the scalp before applying treatments. Overuse of products on a clean scalp can cause unnecessary irritation.
Make Lice Checking a Family Routine
Lice don’t discriminate — adults, teens, and kids are all potential hosts. The best way to avoid future infestations is to make checking a regular household routine.
Set aside a “lice check day” once a month, perhaps right before bath time. Keep your Mama Minnies handy, and use it as a preventive wash even when no lice are visible. Natural formulations make it safe for regular use and provide ongoing protection.
By staying consistent and vigilant, you’ll never have to face another lice emergency — only peace of mind.
Conclusion – Checking Is Caring
Checking for lice properly isn’t just about looking through hair — it’s about caring for your family’s comfort and confidence. With the right tools, technique, and a little patience, you can catch infestations early, treat them effectively, and prevent them from coming back.
So grab your comb, turn on a good light, and make lice checks part of your care routine — because nothing says self-care and love like a healthy, itch-free scalp.
FAQs: Everything You’ve Ever Wondered About Lice Checks
How long should a proper lice check take?
Around 30 minutes on average, depending on hair thickness.
Can I check for lice on dry hair?
Yes, but it’s easier to spot them on damp, conditioned hair since they move slower.
Do adults get lice as often as kids?
Not as often, but yes — lice can spread to adults through close contact or shared items.
How can I prevent lice in the future?
Regular checks, proper hygiene, and natural repellents like Mama Minnies Anti-Lice Spray are your best defense.
Should I recheck even after treatment?
Absolutely. Check again 7–10 days later to ensure no new lice have hatched.
Latest Posts:
- What to do if the scalp burns after treatment?
- Can pregnant women use lice shampoos safely?
- Are Mama Minnie’s products dermatologist tested?
- Can anti-lice shampoo cause hair loss?
- Which is better herbal or medicated shampoo?